17 April 2011
26 January 2011
Something Old and Something New

There's no denying it: new is sexy. And the same old thing? The old standby? Not so much. I've been thinking about this a lot ever since a friend of my neighbors' backed into my car last week, leaving a significant dent. The poor girl was already quite battle scarred and, by most accounts, OLD for her 11 years, but still runs just fine. The financially prudent thing to do would be to just keep driving her trusty wheels on into the sunset. But, instead, all I can think about now is how soon I can trade her in for a new, sleek, young thing. The temptation is too great...someday soon, I will succumb.
Posted by
Nisa
at
10:09 PM
1 comments
15 November 2010
Soupy Sunday
A few weeks ago the weather shifted from ridiculously hot to ever-so-slightly cool; a shift that signals fall here in Texas. Seasonal transitions always inspire me and this one was particularly welcome because it meant I could finally have another dinner party. (My house is so tiny that any group of four or more for dinner requires dining al fresco.) Anticipating that this day would eventually, mercifully arrive, I've been drooling over the "sunday suppers" in this cookbook, dreaming of making a whole menu for friends some Sunday this fall. The cool breezes, however, did not blow in a windfall for the ole bank account and instead I settled on a far more humble, but no less delicious menu.
Posted by
Nisa
at
7:02 PM
3
comments
Labels: Fall, Soup, Vegetarian, Winter
11 October 2010
Toast with Roasted Butternut, Goat Cheese and Saba
When it comes to all things food, I like to think I'm pretty well informed. I spend a lot of time (probably an unhealthy amount) reading, daydreaming, and writing about food, so when something totally new and unexpected in the foodie realm crosses my path, I usually perk up and pay attention. When a mysterious ingredient called saba made its way onto my radar, though, I was pretty slow on the uptake.
Posted by
Nisa
at
8:39 PM
1 comments
Labels: Appetizer, Fall, Vegetarian
28 September 2010
Key Lemon Pie
Posted by
Ciel
at
1:47 PM
1 comments
26 August 2010
Aunt Buck's Mandelbrodt
I hadn't had mandelbrodt in years and for some reason recently had a craving for some. The craving sent me digging through my binder of family recipes where I discovered that it certainly wasn't just my grandmother who had a fondness for these dry, biscotti-like cookies. Among the recipes I found no less than four takes on mandelbrodt, all slightly different, from several women of my grandparent's generation on both sides of my family. I'm guessing the dessert's popularity and sticking power has to do with the fact that it uses relatively inexpensive, easily-obtainable ingredients, can be made in large batches, requires no refrigeration, and gets better with age.
When I baked up my first batch recently, I decided to go with Mrs. Harry H. Berman's (aka Aunt Buck, my mom's great-aunt from Chattanooga, TN) version. I liked the look of her recipe and I liked Aunt Buck. In addition to Harry Berman, she went through several husbands in her life, and in her youth was a formidable fisherwoman. By the time I knew her she was an old woman who wore a wig--a fact that fascinated me endlessly as a kid. She gave me little diamond earrings. Surely her recipe for mandelbrodt would be awesome.
The basic process of mandelbrodt-making is to mix up an eggy batter, roll or spoon it into a log or multiple logs, partially bake and then slice the logs, and then bake the slices, turning once so they become golden brown on both sides. Then, while the cookies are still warm you toss them with cinnamon sugar. They are especially tasty with a cup of coffee or tea, or dunked into bowl of ice cream.
Aunt Buck's Mandelbrodt
**be warned--this recipe makes a lot of cookies--probably 4 dozen, depending on the size 'logs' you make. the good news is that they keep well in a covered container and will earn you sugary kisses when you pawn them off on friends
4 eggs3/4 cup vegetable or canola oil
1 cup sugar
1 tsp vanilla
1 tsp lemon juice
1/4 tsp salt
2 3/4 cups unsifted all purpose flour
1 tsp baking powder
1 cup blanched almonds (I used toasted whole almonds and chopped them up a little)
(cinnamon sugar coating--I eyeballed this--I don't like it very cinnamony but you can make this to taste)
1 tsp ground cinnamon
1 cup sugar
Preheat oven to 350 degrees F.
Measure, then sift together flour, baking powder and salt. Beat first five ingredients thoroughly, then add sifted dry ingredients and then nuts. Beat thoroughly.
Using a tablespoon (Buck specifies a tablespoon--I say use whatever spoon you want), spoon mixture onto an ungreased cookie sheet making about 4 strips (or logs) about 1 1/2 inches apart (I made 2 larger logs rather than 4 small ones). Bake at 350 degrees for 15 minutes, or when firm and slightly brown on bottom. Remove from oven and slice into small slices diagonally. Loosen from pan with spatula and then turn each piece onto a sliced side. Return to oven and brown for about 15 minutes or so. Remove from oven and flip each cookie over to the other side and bake for another 15 minutes. When golden brown on both sides, remove from oven, let cool slightly. Mix cinnamon and sugar together in a large ziplock back. While the cookies are still warm toss them into the bag with the cinnamon sugar, seal, and gently shake around to coat the cookies. You may have do do this in several batches and will have leftover cinnamon sugar.
Will keep well in a covered container for at least a week.
Posted by
Nisa
at
10:16 PM
0
comments
19 August 2010
A Meal in Thirty
Hi Folks! It's been a while since I've checked in here...been busy. I thought I'd drop in tonight do a little show and tell about what I had for dinner because it was, in a word, delectable.
Here it is: Seared Steelhead Trout with Fresh Herbs, Tomatoes and Olives; Sauteed Zucchini; Quinoa.Ain't she purty? (The food that is, not the photo stylings. What can I say? It was dark. I was hungry.) You wanna know something great? The whole thing, from opening the fridge to sitting down to eat, took all of 30 minutes. Yes, I timed it.
The one sneaky trick I had up my sleeve was a tupperware full of pre-cooked quinoa, but since it takes only 20 minutes or so to cook quinoa, even without that advantage I still could have pulled off the meal in much less than an hour. And so can you! Here's how...
Ingredients (makes 2 robust servings):
1 cup quinoa (you'll have leftovers)
1 medium zucchini, chopped
1/2 large onion or one medium onion, roughly chopped
Bragg's or soy sauce to taste (maybe 1-2 T?)
about 3 T. olive oil
1 lb. steelhead salmon filet
6ish cherry tomatoes, chopped
8 ish kalamata olives, chopped
1 clove of garlic, diced
1/2 a lemon
about 1 T. or so dry Vermouth or white wine
small handfull of fresh parsley, chopped
about 1 tsp. of your fave dried spices for fish (I use a blend that features fennel seed which I love)
pinch dried red pepper flakes
kosher salt and fresh ground pepper
Bring two cups of water to boil. Rinse quinoa in a fine strainer and add to boiling water. Stir, reduce heat to a simmer, and cook, covered, for about 20 minutes stirring occasionally.
Begin to heat up a medium cast iron skillet on medium heat. Meanwhile, chop your onions and zuke. Film the bottom of the pan with about a T. or so of olive oil and when hot, add the onions, stirring frequently until they begin to turn transparent. Add zucchini and about a T. or so of Braggs/soy sauce and stir. Cook, stirring frequently and adding more sauce to taste, until zucchini reach your desired level of softness (I like mine pretty soft--probably about 8 mins).
Meanwhile, begin heating the saute pan for searing your fish over medium high heat. While pan heats, sprinkle dried herbs, red pepper, kosher salt and pepper over the fish. Chop tomatoes, olives, garlic, and fresh herbs. When pan is hot, add about 2 T. oil to the pan and quickly add the fish, skin side up. One you place the fish in the pan, don't mess with it for about 2 minutes or so. After a couple of minutes it will be have a nice golden browned crust and you will be able to easily flip it without it sticking. Flip it over and sear the other side for another couple of minutes. Depending on how rare you like your fish, you will only need to cook it for about 4-6 minutes total, so after about 4 minutes check it--if it's cooked enough in the thickest spots go ahead and remove to plate (it will continue to cook a bit so best to err on the rare side).
Keep heat on under the fish skillet and toss in tomatoes and olives, stirring for a minute or two until they begin to soften. Add garlic, half the fresh parsley, lemon juice, and vermouth/wine. Cook for another couple of minutes, toss in the rest of the fresh herbs, and pour over the plated fish. Serve zucchini and quinoa (with butter if you like) alongside.
Bon appetit!
P.S.: Since you'll have leftover quinoa, you might want some ideas for how to use it. In addition to this meal, here's what I've done with one cup of quinoa I cooked earlier this week:
--1 meal of quinoa 'fried rice'--stir fry whatever veggies you have laying around with sesame oil, ginger, garlic, and whatever sauces you like to use. Stir in an egg at the last minute
-2 meals of quinoa 'taco salad'--heat quinoa with cooked/canned black beans and stir in cooked veggies (broccoli, squash, carrots, peppers, etc.). Top with grated cheese, chopped tomatoes, avocado, and salsa.
-quinoa salad: mix quinoa with chopped jalapeno/serrano, red onion, feta cheese, toasted pine nuts, chopped cilanto, dired cranberries. Dress with olive oil, lime juice, salt and pepper
This isn't gourmet stuff here folks, but it's good, healthy, cheap, and quick eating.
I'd love to know your favorite ways to use quinoa too!
Posted by
Nisa
at
8:50 PM
1 comments
28 July 2010
Fried Green Tomatoes
My mom grew up in Jackson, Mississippi and her favorite "southern" foods from her youth often showed up at our table. Okra was a regular staple, as were collard greens, cheese grits, and sweet potato biscuits. Every once in a while as a special treat Mom even made her absolute favorite: boiled peanuts (there's a future post there for sure folks). Fried green tomatoes, however, never graced our plates, probably because Mom isn't a big fan of tomatoes period and also generally avoids anything fried. But when I fell in love, as a young girl, with the book Fried Green Tomatoes at the Whistle Stop Cafe, she gamely handed over her cast iron skillet and let me try my hand at making them using the recipe included in the book. I don't really remember much about the results of this early foray into the kitchen so I think they must have been pretty lackluster. Probably I was just disappointed that simply by making them I wasn't somehow magically transported to the Whistle Stop of my romantic/nostalgic fantasy.
Recently gifted several large green tomatoes from the prolific garden of friends (thanks Blaine, Laura, and Bill!), I decided to try again. Honestly, I'm now no more experienced in the nuances of frying anything, much less tomatoes, than I was back then, and I had no real recipe to use as a guide, but that didn't stop me. I also didn't have a camera on me to document these shenanigans and had to use my phone so I apologize for the extra-lousy photos. 
What I did have was Laura's advice to double dip the sliced tomatoes--first in buttermilk, then in a mixture of flour and cornmeal, then once again in the buttermilk and finally the flour mixture. Laura's from Georgia so I figured she should know. It was great advice because these suckers were delicious! Really really good. If you wait until the oil is hot enough and fry them just right, the slightly sweet, slightly tart tomato gets cooked to the point of tenderness but not sogginess and is perfectly paired with the crunchy cornmeal batter. They were fantastic hot and straight out of the pan, lukewarm for seconds a little later, and still truly awesome leftover the next day cold straight from the fridge! Ketchup entirely optional.
If you can manage not to eat them all up unadorned as I did, I think they'd be phenomenal as a base for a poached egg with hollandaise, or some kind of gravy. Or how about a fried green tomato shrimp remoulade? I'm thinking yes.
Fried Green Tomatoes
**Please use this recipe as a loose guide. I was kinda eyeballing everything as I went, had to pour out more buttermilk, flour, and cornmeal a few times, and didn't really measure. I think it's a pretty forgiving process, though.
1 cup (ish) all purpose flour
1 cup (ish) cornmeal
1-2 cups buttermilk (lowfat is fine)
peanut or vegetable oil
salt and pepper
Pour oil into a heavy skillet (cast iron is my fave) until it's about 1/2 inch deep (feel free to use more oil if you're feeling particularly extravagant or nostalgic). If you're frying up a lot of a tomatoes or want to finish relatively quickly, you might want to use more than one skillet. Heat at medium temperature until oil is quite hot but not smoking. Meanwhile, mix together the flour and cornmeal along with a good bit of salt and pepper on a plate and pour the buttermilk into a shallow bowl. When the oil is hot (you can test by tossing in a sprig of fresh parsley or other herb and seeing if it sizzles up nicely), start double dipping the tomatoes (buttermilk, then flour mixture, then buttermilk and flour mixture again).
As you finish dipping each tomato, drop it in the skillet. You want to fry only maybe 4-5 at a time depending on the size of your skillet--avoid crowding them. After a few minutes check the tomatoes--when they are golden brown, flip over and fry the other side. Remove from pan and drain on paper towels (now's not the time to skimp for the sake of the trees, folks). You might need to finish with a little extra salt to taste.
**Lily's lovebird, Birdy, helped me with my frying technique. Also, we made fried okra--same concept entirely.


Posted by
Nisa
at
8:07 PM
0
comments
19 July 2010
Really Like Your Peaches
I wait impatiently all year for peach season. Sure, all fruits and veggies are at their prime when eaten freshly picked at the right time of year, but I think peaches are particularly so. To me, summertime is made all the merrier by the fact that it's peach season here in the Texas hill country. I've had California peaches fresh from the orchard and Georgia peaches too, and I have to say with more than a pinch of native pride, give me a Texas peach any day. To my palette anyway, a Texas peach is sweeter, juicier, and somehow just peachier than any other. Lucky for me and the countless other Texas peach fanatics, it's been a banner year.
A few weekends ago some friends and I drove out to an orchard near Fredericksburg, in prime hill country Peach territory, to pick some straight from the source. If you have ever gone berry picking only to be dismayed by how looooooooong it took to fill your bucket or box, you should really try peach picking. In what seemed like a matter of minutes we had picked a peck of big, fat peaches. Actually, we picked about half a bushel which, if you can picture it, is about enough to fill your standard office file box. Even though I shared the box with a friend and ate fresh peaches every day as they began to soften, by last week when the vast majority of them ripened simultaneously, I had a helluva lot of peaches on my hands.
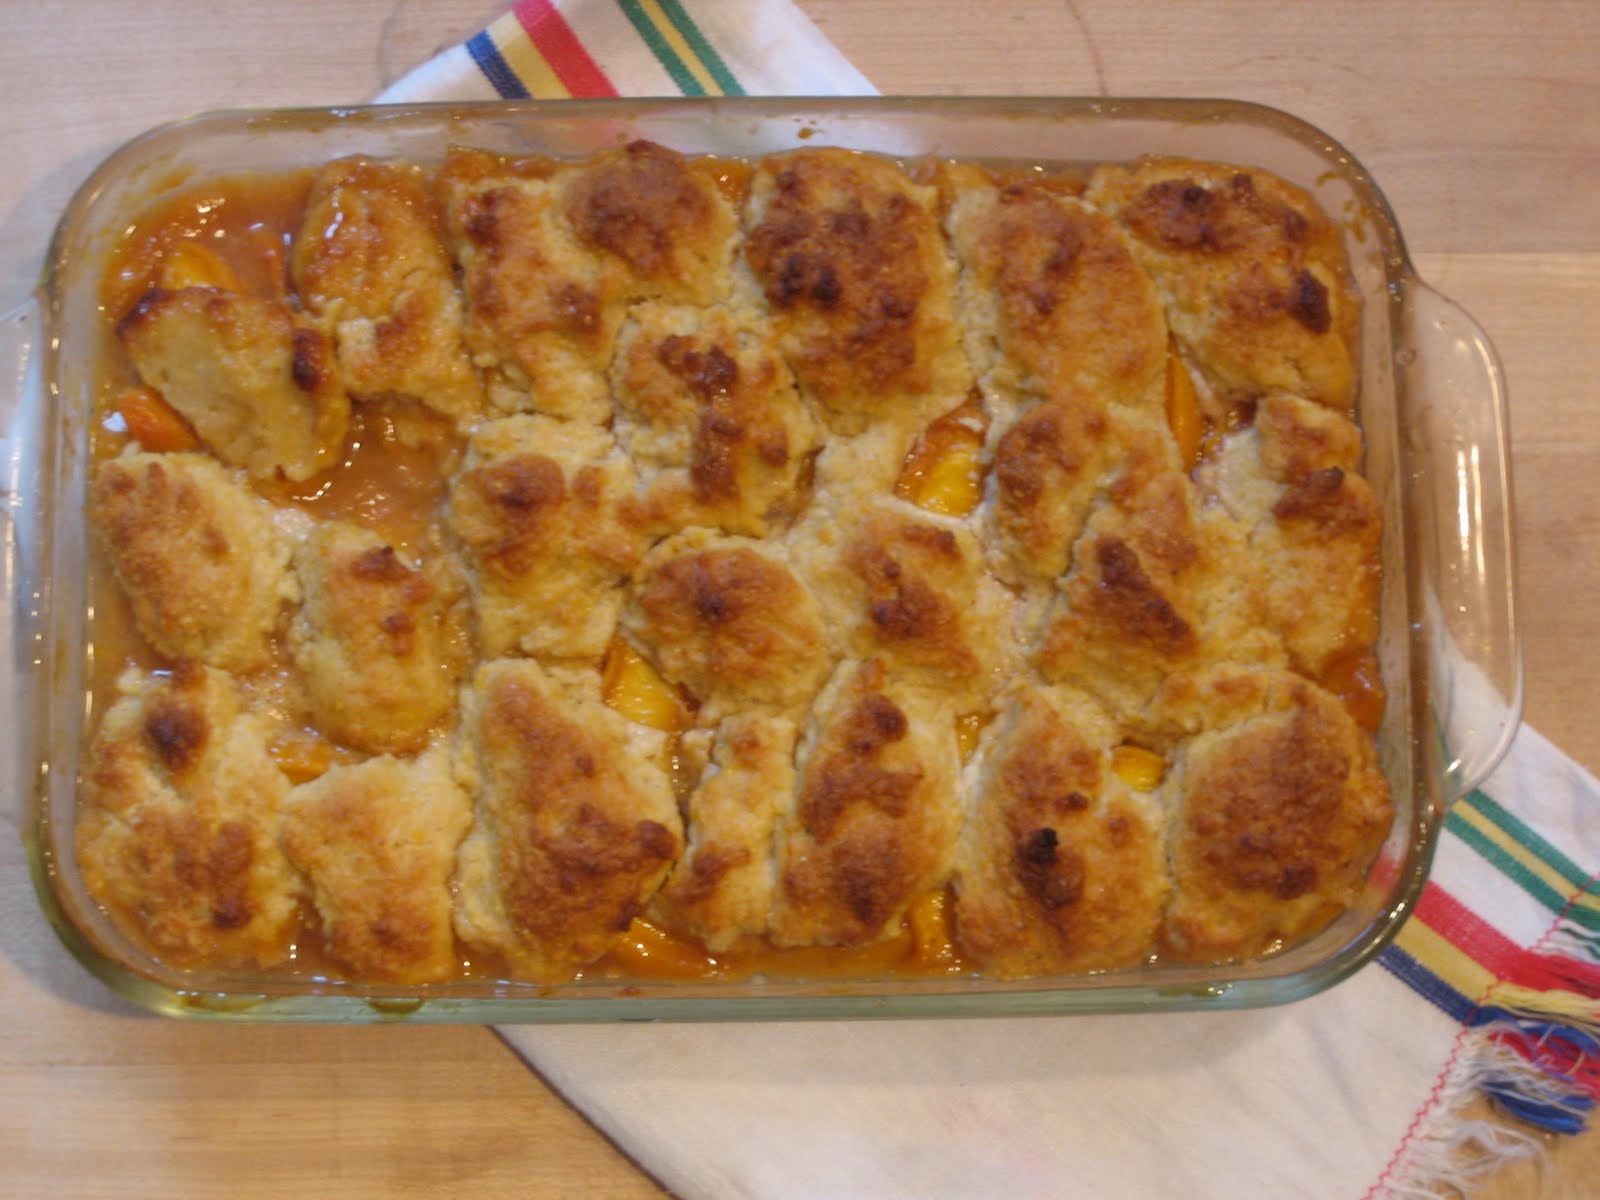
Intent not to waste even one precious peach, I knew I'd have to get a little resourceful. Freezing was an option, but with my luck I'd forget about them and they'd succumb to frost bite--a shameful end for such seasonal treasures. I opted to bake them instead and my tastebuds, and those of several willing dessert guests, are rather pleased with the choice (as for my waistline, well, the jury's still out).
A good number of the blushing yellow fellows found their way into a Peach Pudding Cake, baked last week and consumed with such gusto that I failed to capture its fleeting presence with a photograph. You'll simply have to take my word for it that this dessert is PRIMO. Slices of peaches arranged over the top of rich vanilla cake batter sink down to the bottom when it's baked. The thin sheet cake's center is soft and pudding-like but the high butter content creates a divine crispy edge. It's not the most beautiful dessert to look at, but as with most things important in life, it's not the looks that count. A generous spoonful or two of cold heavy cream over the top comes highly recommended.Later in the week, restored by a few days of comparably ascetic fresh peach eating, I went back to the baking board with cobbler on my mind. It couldn't be just any cobbler, though. I wanted it to really feature the peaches, their flavor unadulterated, and to have a biscuit topping with some real character. Enter the sweet cornmeal biscuit recipe from Deb's cobbler. With such a toothsome topping, juicy slices of cooked peaches, brightened by just a little bit of brown sugar, lemon, and cinnamon, meet their perfect match. Double the biscuit recipe and you'll have plenty of topping plus some leftover to make impromptu peach shortcakes!
Isn't that just peachy?
This recipe is from Bon Appetite but supposedly the original source is the Hyde Park Bar and Grill here in Austin. Their cake is called Wom Kim (???). Anybody want to join me there sometime for a little comparison taste test?
1 3/4 cups plus 2 tablespoons all purpose flour
2 1/4 t. baking powder
3/4 t. kosher salt
1/2 t. baking soda
1 1/2 sticks unsalted butter
1 3/4 cups sugar (I used less but my peaches were especially sweet)
2 T vanilla extract (yes, 2 tablespoons)
2 large eggs
3/4 cup buttermilk
cream or whipped cream for garnish
Preheat oven to 350 F. Spray 9 x 13 inch glass dish w/ veggie oil and set aside. In a bowl whisk together all the flour, baking powder, salt, and soda. In a separate bowl use an electric mixer to beat butter until smooth. Gradually beat in sugar. Add vanilla, then eggs, one at a time, incorporating both well. Using low speed, add dry ingredients alternating with the buttermilk in three additions each, beating well between each addition. Transfer batter to baking dish, spreading evenly. Arrange peach slices over the batter, overlapping them slightly. Spray a sheet of aluminum foil w/ vegetable oil and cover cake w/foil, spray side down, sealing edges. Bake for 45 minutes, then remove foil covering. Return to oven and continue baking until top is golden brown, edges are crusty and a cake tester inserted into the center comes out clean--about 40 more minutes. Cool for an hour and then serve topped with cream (whipped or not).
6 cups sliced, peeled peaches
2/3 cup packed dark brown sugar (I used regular and a little less)
2 T flour
2 T fresh lemon juice
1/4 t ground cinnamon
1/4 teaspoon salt
Biscuit Topping:**double this for lots of topping**
3/4 cup all purpose flour
1/4 cup fine stone-ground cornmeal (not sure if mine met the specs...worked out fine)
3 T dark brown sugar (used regular and a little less)
1 1/2 t baking powder
1/4 t salt
3 T cold unsalted butter, cut into pieces
1/2 cup buttermilk
Preheat oven to 425 F. Toss together peaches and seasonings and pour into a 2 quart ovenproof dish.
Make dough: Stir together flour, cornmeal, brown sugar, baking powder, and salt. Cut the butter into the dry mixture with your fingers or pastry blender. Stir in buttermilk with a rubber spatula until wet, tacky dough comes together.
Drop dough over the peaches by the spoonful covering most of the surface. Bake until the fruit and syrup are bubbly and the biscuits are browned (Deb says this should take 20-25 mins but at that point mine was still raw--I cooked it for about 40 mins). **you may want to place a baking sheet underneath it in the oven to catch drips. Let cool a bit and then scoop into bowls, top with cream or ice cream.
**Special shout out to Katie and Leah for their baking assistance. Merci!!**
Posted by
Nisa
at
3:42 PM
0
comments
09 July 2010
Chocolate Zucchini Cake
All of the sudden, it is raining zucchinis in our garden at Twin Sisters Farm. Every day and every meal, I am trying to come up with creative ways to incorporate more zucchini into our bellies. I have made zucchini/chard enchiladas, two types of zucchini bread, and will attempt to make Smitten Kitchen's zucchini and ricotta galette this weekend. So far in the battle of the zucchini, the chocolate zucchini cake has been the victor. I first made a healthy version using plain yogurt and vegetable oil. Then, Jill Mason raised the stakes with this super moist and addicting version which uses milk and a healthy dose of butter. Give it a try, you will not be disappointed!
Posted by
Ciel
at
10:54 AM
0
comments